Word Support FAQ
How to solve
1. Open the File Explorer and navigate to either “C:\Program Files (x86)\Aligned AG\Aligned Elements” or “C:\Program Files\Aligned AG\Aligned Elements for Word x64”
2. Find the file “ProjectView.exe” and right-click to select Properties. Click on the Compatibility tab.
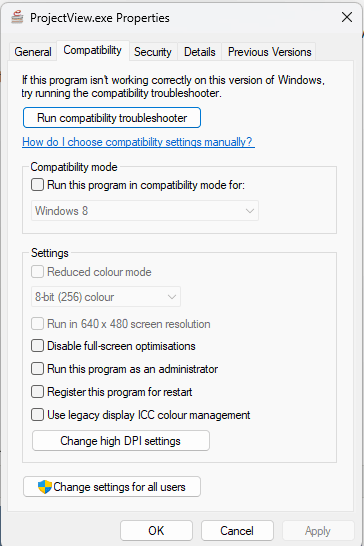
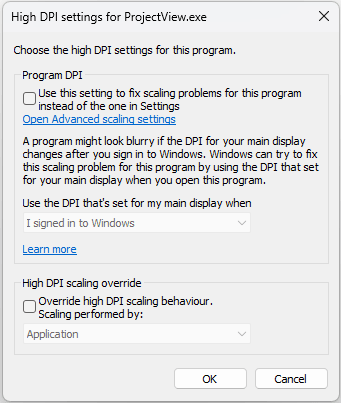
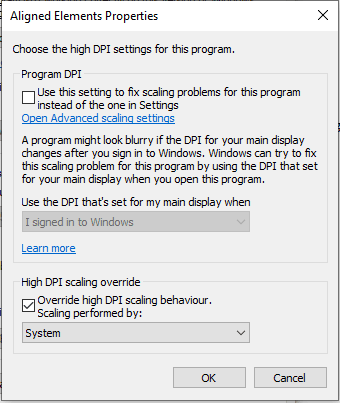
3. Click on the ‘Change high DPI settings’ button
4. Un-check the ‘High DPI scaling override’ at the bottom. Click OK and OK. Reopen the Word document from Aligned.
If ‘High DPI scaling override’ is set to e.g. System but is disabled, i.e. you cannot uncheck it, then do the following:
- Click Cancel in the dialog ‘High DPI settings for ProjectView.exe’
- In the dialog "ProjectView.exe"-Properties, click on the button ‘Change settings for all users’ at the bottom of the dialog
- Now repeat: Click on the ‘Change high DPI settings’ button and uncheck ‘High DPI scaling override’. Click OK and OK. Reopen the Word document from Aligned.
Aligned Elements uses content controls in order to insert information in MS Word documents. The content of these content controls can be synchronized by clicking "Synchronize" or "Force Update" in either:
- The toolbar in the Aligned Elements Word Add-In
- The Action dropdown in the file Object in the Aligned Elements UI
Content Controls may be placed in:
- The Header of the Word Document
- The Body of the Word Document
- The Footer of the Word Document
Due to technical constraints in MS Word, it is not possible for Aligned Elements to synchronize/update content controls in headers and footers in Word Documents.
Furthermore, having content controls in the header or footer can sometimes lead to unforeseen errors when synching/updating the body of the Word documents.
To prevent this, the "Synchronize" and "Force Update" buttons are, as of Aligned Elements V3.0 SP 1, no longer available in the Word Add-In toolbar when the Word document contains content controls in header or footer.
It is still possible to synchronize/update content controls in headers and footers, when performing these actions from the Action dropdown in the File Object.
Problem: when clicking on the blue File Attribute link to open a Word Document, the error "The system cannot find the file specified." is displayed and MS Word does not open, even though MS Word is installed on the computer.
Solution: this error might occur if the Windows Operating System cannot find the WinWord.exe file on your computer, needed to start Word.
Do the following checks to verify this problem:
Check 1) Click the Windows Button + R to open a Run window. Type "WINWORD.EXE" in the text field in the Run window and click OK. If MS Word does not start, then this is another indication that Windows cannot find the WinWord.exe file.
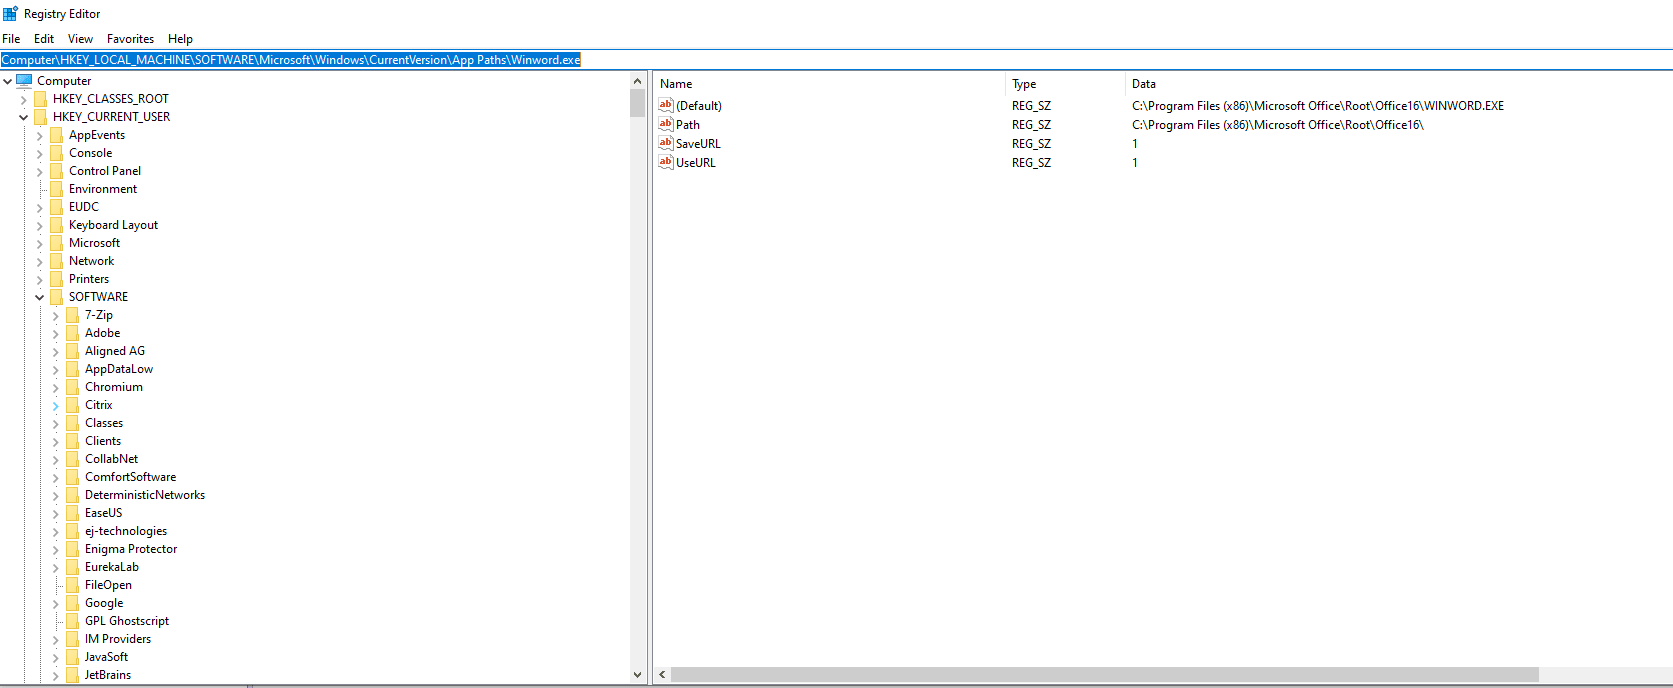
Check 2) Click the Windows Button + R to open a Run window. Type "regedit" in the text field in the Run window and click OK. This will open the Registry Editor. Navigate to the path "HKEY_LOCAL_MACHINE\SOFTWARE\Microsoft\Windows\CurrentVersion\App Paths\Winword.exe". If this location does not contain 4 entries (but only an empty string), then this is another indication that Windows cannot find the WinWord.exe file.
To find where MS Word is installed on the computer, open the start menu and find the Word icon. Right-click on the word icon and select "Open File Location" or More => Open File Location in the context menu. This will open the file location of the Word shortcut. Right-click on the word shortcut and select "Properties" in the context menu. In the Shortcut tab page, find the Target text field which contains the path to the WinWord.exe.
Use this win word exe path to update the Registry for the registry path defined above, using the following pattern:

Word Add-in or Template Builder does not display properly using Dark mode.

Solve the problem by switching back to Standard Mode.
Use these settings:
Click the File tab => Options à General => Office Theme => Select “Use System Setting”.
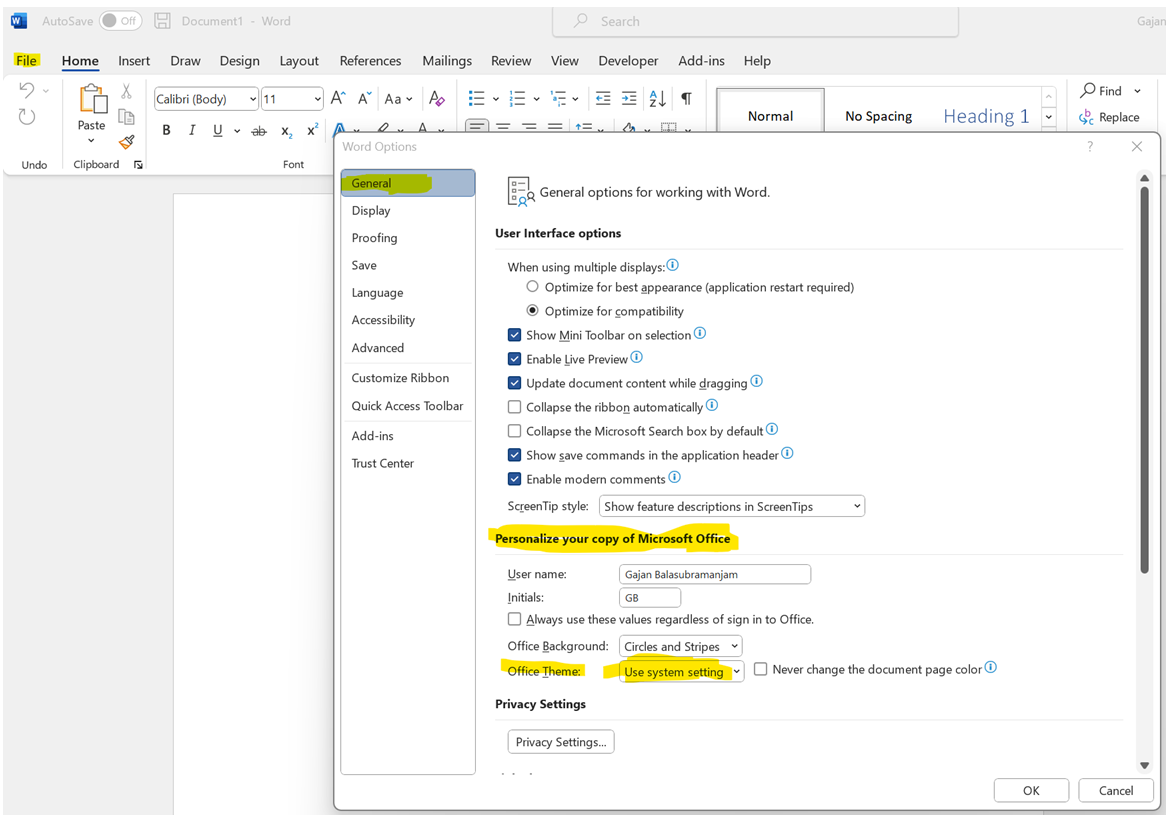
Close and reopen the MS Word application. The data will appear as expected.
When using the Aligned Elements Windows Client, starting the Word Add-In displays the following error:
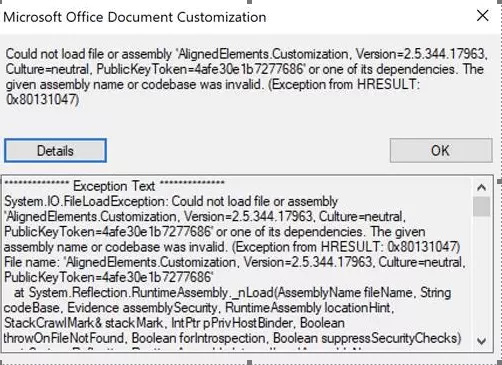
The error is an indication of that Word is installed as 64-bit on this computer but the Aligned Elements application expects a 32-bit Word application.
How to solve it
First, verify that you are using a Word 64 bit version.
Then uninstall your current Aligned Elements application.
Go to the Download Setups page and make sure you download the "Aligned Elements Windows Client - Word as 64 bit" set up. Make sure you download the correct version!
This happens for the Aligned Elements Windows client on Windows 11.
The error says "An unexpected error occurred. Please mail the logfile to
On Windows 11 machines, the Microsoft Word installer sometimes do not set the path to the “Winword.exe” in the registry.
Consequently, Aligned Elements fails to start “Winword.exe” since its path is unknown to AE.
How to solve it
Manually adding registry values for this makes the problem go away.
The image below displays the expected registry settings:
If the Aligned Elements Web Client Word Add-In does not display any icons, proceed as follows:
1) Open MS Word.
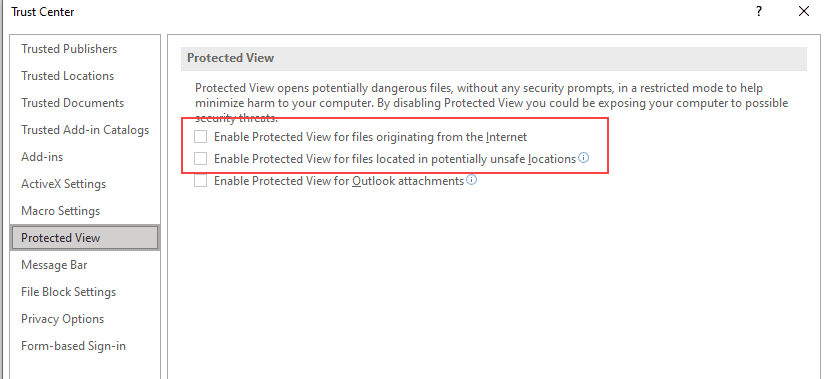
2) Click File => Options => Trust Center => Protected View
3) Make sure that the first to checkboxes ( "Enabled Protected View for files originating from the Internet" and "Enabled Protected View for files located in potentially unsafe locations") are not selected.
Word documents and the Word Add-in displays in an awkward manner in Windows 10, version 20H2

How to solve it:
1) Find the Aligned Elements shortcut
2) Display Properties => Compatibility Tab
3) At the bottom of the tab click "Change high DPI settings"
4) At the bottom of the displayed dialog, in the section "High DPI scaling override", if the check box for "Override high DPI scaling" is selected, select "System" (and not e.g. "System (Enhanced)") in the dropdown.
If a VSTO customization cannot be uninstalled with the regular Control Panel - Apps & Features dialog, then access the "old" Programs and Features Dialog by clicking "Programs and Features" under the section "Related Settings" in the Apps & Feature dialog of the Control Panel. In this dialog, the VSTO customization can be uninstalled.
